Wednesday, November 30, 2011

Our Advent Calender

Just a quick post today as I have *so so so so* many things to do before this market on Saturday!

I wanted to share our home made Advent Calender with you!


Its one of those things that can be as simple or as complicated as you feel like. This year we have gone for simple! In all those weeny parcels are a sweet treat, and all are numbered 1 - 24 (actually there are three parcels with the same number so my kids all get one each) and each day they sift through and look for the days number.  There are a few small surprises in there, some Christmas earrings and erasers etc. In previous years we have included little notes telling them what activity we will be doing that night, like setting up the tree, driving to look at Christmas lights, baking Gingerbread Men.. you get the idea! 

Even the tree can be simple, this year ours is just some pine and fuchia branches in a vase! But you could get all sorts of creative, I have thought a big glass vase full of Christmas lights with all the little presents around the bottom would look great!

The smaller the pile of presents gets, the nearer we are until the day :) I think it would be safe to say our advent calender is a highlight of my children's Christmas!
Happy Christmas Days!!


Jacq :)

Tuesday, November 22, 2011

Lets make bread? C'mon! you CAN do it! Its easy!

Anyone who knows me personally knows I love to make bread!
I think I might have yeast in my veins (along with coffee!) :)

I have been making bread for what seems like forever, I am going to guess about 10 yrs? and in that time I have had *alot* of failures and learnt alot of lessons!

My breadmaking got to a point where I had a little business going, and many family and friends would buy freshly made bread for their families. Now I have heard some of you have been missing those Tuesdays, so that's prompted me to share how I make my bread! And I really hope it will encourage anyone who reads it to have a go and make their own.


Lets talk about the ingredients first. I am a no fuss kind of girl. The ingredients I use are easy to come by, I am also a frugal girl, while I would love to live the organic life its just not a viable option for my family at the moment! 

I use a Lauke Flour ~Wallaby bakers flour~ available in most supermarkets 5kg bag for about $10 (that will make you about 20ish loaves!) Lauke support organic farmers and buy organic wheat when they can, but are not certified organic (and its made in Victoria!)

Other than flour I use
  •  Salt, if you want to use fancy salt go right ahead! I use boring salt ;)
  •  Sugar, doesn't matter what type! I use raw, white is fine, you can easily substitute it with honey
  • Yeast, I buy the Lowan yeast you can see in the picture, its the cheapest way to buy it.
  • Oil of some sort, we use olive oil, sometimes a veg oil, marg if that's your thing and butter is very yummy too!
  • I have a multigrain mix that I make up, which we can chat about another time, so if you want a bit more substance to your bread a good handful of oats or even quick cooking oats is a good addition. 
Easy so far right! I would guess that you have most of these things already, the flour and the yeast will set you back probably $15....not much of an investment..... :)

Ok, next lets think about equipment. I am lucky enough to have a professional Kitchen Aid (still loving it!). Bread has been made by hand for about a gazillion years, if you don't have a mixer with a dough hook, your bread will still be awesome!
The one thing I have that absolutely guarantees perfect bread everytime is a set of digital scales.

go. buy. some. now. Trust me!

Ask Santa, steal your neighbours, whatever!...actually you can pick them up pretty cheap these days so no need to steal!
Other than the scales a big bowl, a spoon and some kind of baking tray and bread/cake tin are good too!
So.....are you ready??

The Recipe and Method

My recipe makes about 1400gms of dough, if your gonna do it, you may as well make extra and freeze it or just eat more :) This is enough to make 2 large loaves, or 1 and a couple of pull aparts. If you're making it by hand, go ahead and use the quantities I give, if you are using a machine you will probably need to divide it by half, check your machine instructions on how much it can handle! 
  •  In a big bowl add 420gms of warm water (yes weigh the water too!)
  • Add 9gms each of salt, sugar and yeast
  • Add 30gms of oil
  • Add 750gms of flour (and your handful of oats if you want) 

  • Mix it either by machine, or spoon and then your hands
  • Knead the dough (plenty of great diagrams/instructions on Google) until it becomes smooth and elastic


  • Now its time to let it rise, cover your bowl with something like glad wrap, or even a plate and put it somewhere warm (sometimes I put mine out in the sun, or on the oven if its on etc). I think humidity is a key factor at this point so while most recipes suggest covering with a tea towel I prefer my own way!
  • Let it rise until its about twice its original size. 
  • Give it a bit of a knead again until its back to its normal size.
  • Here's where the fun starts! Decide WHAT shape your dough will be! I weigh my dough as well which helps to know how long to cook it for and in your presentation :) (yes I am anal about it!) 300gm is a good amount of dough for a plait, so out of my recipe I will make 2 plaits and use the rest for a loaf
  • So using your scales divide up your dough.
  • Lets make a ham cheese tomato plait! (my kids fav!)
  • Roll out your dough into a long kind of shape (like the photo, though no need to be perfect) and place it on some baking paper
  • Using a spoon, spread on some ready made (I know, I know I should make my own!) pasta sauce


  •  Lay some ham on top.....we like a good ham, double smoked is yum

  • Then some cheese, whatever sort! Mine is just block tasty cheese chopped up ( I hate grating cheese!)
  • Now for the fun bit! If you look closely at the photo below you can see I have made 1 inch wide? cuts along the edge (on both sides about 1/3 through) these are the parts we are going to 'plait'
  • starting on one side fold one flap on an angle towards the middle, the do the same to the other side trying to fold it over the previous flap. Don't be afraid to stretch them, its only dough :)
  • Continue alternating all the way until the end, with any odd bits just tuck them under or fold them over, its doesn't really matter! Sprinkle some cheese on if you like. Don't be too concerned with neat and tidy consider it 'rustic'! Its still going to taste great! Lift it using the baking paper on to a tray.
  • Its now I preheat my dinosaur electric oven to 180- 200 degrees (and sit my tray on top for the 2nd rise)
  • Cover if with plastic again and let it rise again for about an hour if its in a nice warm spot, it won't want to double its size again with all the filling in it but it should look nice and chubby :) perhaps a little more than the photo below!

  • For a loaf, follow the same rising instructions but in a tin sprayed with cooking spray (any tin will do!)

  • Cook then in your preheated oven till they are nice and brown and sound hollow when you tap them on the bottom!


And that's it! I know it seems like a lot of instructions but its pretty quick really, other than the rising time you could make it with only 20 minutes at your kitchen bench. There are many many fillings you could use, don't be afraid to experiment!

I often make the plaits, chop them up into kids size bits, freeze them, then I can just put them in their lunch box instead of a sandwich and have happy kids :)

Something I would like you to keep in mind, don't expect your beautiful homemade bread to be like white bread from the supermarket, it WILL be much better and your house will smell heavenly!


If somethings not clear, please feel free to ask I am happy to help :)
So go on.....just do it!


Jacq :)


Sunday, November 20, 2011

The weekend

In an effort to avoid the truck show that was on in our town (and all that comes with it), we had a lovely quiet weekend pottering about at home. We did what we love doing....some of not much and alot of making and a bit of baking!

PJ Shorts for the Gman

More trucks and stacking men


A dress for DirtGirl for Christmas Shhhhh!


Doll Uniforms.... another secret!

More Ducks! ( I could sew them in my sleep I am sure!)

Breadmaking....lets talk more about this later in the week ;)


And an odd looking Lasagne for dinner....


 I urge to you take a peek at an auction that Kids Market Central Vic have organised to raise money for CentreCare Xmas Toy Drive in Bendigo, theres is a facebook album full of donated goodies you can bid on, and help a good cause! You can find some of our grey kitties in there waiting for a new home :)


And so we begins another week! Closer and closer to Christmas we creep.....and holidays!


Jacq :)


Tuesday, November 15, 2011

Peas PAHLESE!!!!!


Really you can't go past home grown veggies can you!  
If you have a fussy eater, perhaps give some thought to growing some veggies somewhere in your yard. There is so much fun to be had, planting seeds or seedlings, watering daily and watching them grow into dinner!
These wonderful peas were grown by my mum in her garden, I am sure that makes them all the more attractive to my girls, who ate quite alot of them while they shelled them ALL! 
There are so many learning opportunities (and memories) to be had in simple everyday tasks, if we choose to take the time to move slowly and take notice!


Happy Days!


Jacq :)

Sunday, November 13, 2011

A slow(ish!) weekend

We went out and about this weekend to visit Robs brother David and his wife Maree at their beautiful home/paradise!. 
It was such a treat to sit about in their lovely garden eating a delicious meal, watching the cockatoos, butterflies and dragonflies, all the while chatting and chatting! And you know I can't resist a photo,  between the kids and I we took at least 100! Here are just a few special ones :)


My Chalk and Cheese :)


The lovely Sasha


An explorer


A quiet shady spot 
 
A visiting cockatoo


The kids asking David many questions about his fire shelter!


The more my eyes open, the more I marvel at this place we call earth :)


What did you get up to this weekend??


Jacq :)
Thursday, November 10, 2011

Sunday, November 6, 2011

Weekending


 We had a great weekend filled with new ideas, making stuff, dinner with people we love, a sleep-in, finished off with a little backyard picnic dinner of good óle baked bean jaffles with the kids! 


Friday, November 4, 2011

A thrifting find.....

To tell you the truth, I am really not much of a decorator. I envy other peoples color co-ordinated stylish homes, or perhaps envy even more their ability  to create such spaces.
 I am more of a girl that looks for function rather than aesthetics, but everynow and then I come across something that makes my heart sing! 

And this my friends, is one of those such things.....
Its a handpainted/burned Jackalope on a big tree biscuit 
that doesn't match anything else in our home! 


Don't you just love him!!!


Hope you have a wonderful weekend!

Jacq :)


Tuesday, November 1, 2011

Our Freebie Day

I like to consider public holidays 'freebie days', no school and no work gives us an extra day to hang out together!  I usually try and find something special to do.....
Apparently there was a horse race on today.......yeh whatever! We took the opportunity to check out our new park in the Castlemaine Botanical Gardens, and the verdict is.......AWESOME!!!!!
I was really worried when they first announced they were going to pull down the old playground and replace it, thinking there was a possibility we would be getting some huge plastic horror. I and probably many others have been so surprised at just how fantastic it has turned out. 


More lovely trees planted and heaps of seating for parents...


A real looking house cubby house, chimney and all

This is a view of inside the cubby you can see in the picture above
                                        
Some crazy mirrors!


And you know which one we liked better!
 
 
Interesting sculptures, these acorns are under a huge Oak Tree


Leaf shapes punched in the side of the metal fort


Marbles!

Chairs carved out of huge tree trunks

This hammock would have to have been the absolute favourite of all the kids at the park today! We were lucky enough to bump into some good friends enjoying the park as well, they had a great time swinging each other over and over again!


One of the many historic and massive trees we are blessed with 


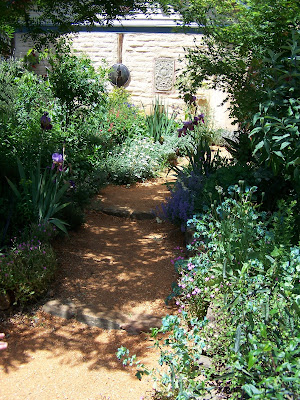
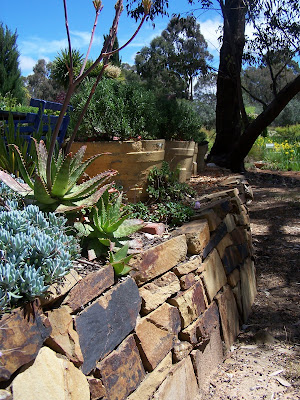
On the way home from our visit to the park we stopped at an open garden I have visited many times, its such a oasis in what can be an incredibly dry and barren area. The garden is named Luxori and is it can be found in Barkers Creek. Margaret and Max have transformed their home into a paradise as you will see! 


 The lovely Miss Colly, my Sister in Law


Avalon took a picture of Possum the cat, apparently she was a very important part of the day :)


 I am going to sleep well tonight with out a doubt, but a great day and some heavenly spring weather! 

Did you watch the race? or did you too have an adventure!

Jacq :)